
Using PowerPoint
Table of Contents
Main Screen ...................................................... 2
New Presentations ............................................ 2
Creating a New Presentation ............................ 2
Presentation View Buttons ............................... 3
New Slides ........................................................ 3
Adding a Slide ................................................... 3
Slide Layout ...................................................... 3
Changing the Slide Layout ............................... 3
Normal View ..................................................... 4
Notes Area ........................................................ 4
Slide Sorter View .............................................. 5
Moving Slides ................................................... 5
Adding Pictures to Your Presentation .............. 6
Inserting a Picture ............................................ 6
Shapes and Word Art ....................................... 6
Inserting a Shape .............................................. 6
Formatting Objects ........................................... 6
Resizing an Object ............................................ 7
Recoloring an Object ........................................ 7
Video .................................................................. 7
Adding a YouTube Video .................................. 7
Hyperlinks ........................................................ 8
Adding a Hyperlink .......................................... 8
Themes .............................................................. 9
Adding a Theme ................................................ 9
Transitions ........................................................ 9
Applying Transitions ........................................ 9
Photo Album ................................................... 10
Creating a Photo Album ................................. 10
Automatic Timings .......................................... 12
Loop Continuously .......................................... 12
Slide Show View ............................................... 12
Giving a Presentation ..................................... 12
Presenter View .................................................13
Switching Display Settings ............................. 14
Hiding the Presenter View ............................. 14
Moving through the Presentation .................. 14
Ending the Slide Show .................................... 14
Guidelines for Good Presentations ................. 15
PowerPoint Quick Reference ........................... 16
Updated: 31 July 2019

2
Main Screen
New Presentations
When you launch PowerPoint, you are given the option to create a new presentation. If you no longer
have access to that screen, you can use the following steps.
Creating a New Presentation
1. Select the File tab.
2. In the left pane, select the New tab.
3. Click on Blank Presentation to create a new blank document.
OR
Use the keyboard command Ctrl + N.
Quick Access Toolbar
Title Bar
Ribbon
Slide /
Outline
Pane
Status Bar
Slide
Zoom
Slider
Presentation
Views

Created by Michelle for OLLI@WVU 3
Presentation View Buttons
PowerPoint allows you to work with your presentation in different views. The
most frequently used views are Normal, Slide Sorter, and Slide
Show. These are all available as icons on the status bar, and also
from the View tab of the Ribbon.
Normal View see page 4.
Slide Sorter View see page 5.
Slide Show View see page 12.
New Slides
New slides can be created from the Home tab of the Ribbon or by using a keyboard command.
Adding a Slide
1. In the Home tab, click the New Slide button.
OR
Use the keyboard command Ctrl + M.
Slide Layout
Once a slide has been created, you will need to choose a layout for that slide. By default, the first slide
is a Title Slide, and the next created slide is Title and Content. There are, however, a variety of layout
options from which to choose.
Changing the Slide Layout
1. In the Home tab click the Layout button.
2. Choose a layout from the drop down menu.
OR
Right click in a blank area and select Layout.

Created by Michelle for OLLI@WVU 4
Normal View
Normal view is the most common way to work on a presentation. It allows you to see three different
things at one time: The slide you are working on, the slides before / after the current slide, and the
notes area.
Each pane can be resized by clicking and dragging on the border between the panes
when the cursor change to display a double-headed arrow.
Notes Area
The notes area is a space for you to enter text you want to give during your presentation. This text can
be a brief outline of the points you want to hit for the given side, or the entire text you plan to
memorize for the presentation. The notes area can be toggled by clicking the Notes button in the
status bar.
Slide / Outline Pane
Slide Pane
Notes Pane
Created by Michelle for OLLI@WVU 5
Slide Sorter View
The slide sorter view allows you to see multiple slides at one time. It is used to easily apply formatting
to all the slides in your presentation, but it is also the best place to rearrange the slides in your
presentation.
As you work on your presentation, you’ll discover that you’ll need to move sections of it around to
change the flow or logical order of what you are going. In slide sorter view, you can easily select the
slides you want to move them to a new location.
Moving Slides
1. Click to select the slide you want to move. Use Ctrl + click to select multiple slides.
2. Hold down the mouse over one of the selected slides and drag to the new location on the screen. A
vertical bar appears showing where the slides will be dropped.

Created by Michelle for OLLI@WVU 6
Adding Pictures to Your Presentation
The ability to add pictures to a lecture or presentation is at the very root of why PowerPoint exists.
Although text is useful, pictures make a presentation.
Inserting a Picture
1. In the Insert tab click the Pictures button.
2. Browse to where the file is saved.
3. Select the image and click Insert.
OR
1. Open a Windows folder that contains the picture.
2. Drag an image from the folder into the slide.
Shapes and Word Art
You may want to use shapes to highlight things on your slides. In fact, shapes are used throughout
this document to draw your attention to small parts of bigger images. Text boxes can be used to help
label items, or if you have text you want precisely placed on a slide.
Inserting a Shape
1. On the Insert tab click the Shapes button.
2. From the drop down menu, select the shape you want to use.
3. In the area you want to add a shape, click and drag—the
outline of what you want to draw will appear. It’s okay if you
don’t get it right! You can fix the shape after you’ve created it!
Formatting Objects
Once you have created a shape, you can modify that shape by resizing, rotating and recoloring it.
Add a new shape
Insert Shapes
Change the inside color of an object
Shape Fill
Change the outside color of an object
Shape Outline
Change the thickness of the shape outline
Shape Outline
Rotate the selected object
Rotate
Make the object smaller
Size
Set the location of the object within the page
Align

Created by Michelle for OLLI@WVU 7
Resizing an Object
1. Select the shape you want to modify. A bounding box with circles at
the corners and important points appears.
2. Click on one of the white (circle) handles and drag to resize the
object,
3. Click on one of the yellow (circle) handles to change the object within
the bounding box.
OR
In the Size section of the Format tab, enter a new number to change
the size.
Recoloring an Object
1. Select the object to the modified. The Drawing Tools: Format tab appears.
2. To change to outside of a shape, click the Shape Outline button and select from
the desired options.
3. To change the inside of a shape, click the Shape Full button and select from the
desired options.
Video
YouTube videos can easily be added to your presentation. It is highly recommend that you find the
specific video you want before starting the insert process, so you can be certain you have selected the
correct one.
Adding a YouTube Video
1. Select the Insert tab of the Ribbon.
2. Click the Video button.
3. From the drop down menu select Online Video.
4. The Insert Video dialog box opens. In the text
box beside YouTube, type in your search
parameters. In this example, our search
parameters are cookie monster tom
hiddleston.

Created by Michelle for OLLI@WVU 8
5. From the list of videos meeting your search
parameters, select the video you want to use.
6. Click the Insert button.
7. The selected video is inserted into your
presentation.
Hyperlinks
From your presentation, you may also want to go to a website.
Adding a Hyperlink
1. In your web browser, browse to the webpage you want to visit during your presentation.
2. In the location bar of your web browser, copy the URL of the web page. (Ctrl + C)
3. Select the Insert tab, click the Hyperlink
button.
4. In the Text to display box, enter the text you
want to appear in your presentation.
5. In the Address text box, past the full URL of the
web page you want to go to. (Ctrl + V).

Created by Michelle for OLLI@WVU 9
Themes
Themes can allow you to add color and visual interest to your presentation. HOWEVER. Themes can
also be distracting and make your presentation hard to read. It is far better to have a boring looking
presentation that can be read by all viewers than to have one viewers can’t read, or that gives them a
migraine.
Adding a Theme
1. Select the Design tab.
2. In the Themes section, click the more button to see more themes at one time.
3. Scroll through the list until you find theme you like. Holding your cursor over a theme will preview
the select slide as that theme.
4. Once you have found one you like, click on that theme to apply it to your entire presentation.
Transitions
Transitions are a way to add visual interest to the change from one slide to the next. They can be
useful in livening up a presentation, but they can also be extremely distracting. If you feel your
presentation needs transitions, pick a single transition to use for your entire presentation.
Applying Transitions
1. Select the Transitions tab.
2. In the Transition to This Slide section, click the more button to see more transitions at one time.
3. Scroll through the list until you find a transition you like.
4. When you select a transition, you will see a brief preview on the selected slide.
5. Once you have found your transition, click the Apply to All button to apply the same transition to
all the slides in your presentation.

Created by Michelle for OLLI@WVU 10
Photo Album
The second most common use for PowerPoint is to give photo presentations that can run by
themselves as a background at events such as birthday and anniversary parties. This is easily done by
creating a Photo Album in PowerPoint.
Depending upon the age of your computer and the size of your pictures, there may be a lag during
steps of this process. DON’T PANIC.
Wait patiently and the processor should catch up and continue with creating your photo album.
If you have reviewed the pictures and know the order in which you want to show them, add numbers
at the beginning of the file names and then they should be placed in your desired order.
Creating a Photo Album
1. Select the Insert tab.
2. Click the Photo Album button.
3. The Photo Album dialog box opens. Click the
File/Disk button.
4. The Insert New Picture dialog box opens. Use
Ctrl + click to select individual pictures or use
Ctrl + A to select all the picture in the folder.
5. Once the images have been selected, click the
Insert button.
6. Wait Patiently.
If you have a lot of pictures, high resolution pictures, or an older computer, this process can take a
while.
7. Beside Album Layout, choose how you would like the pictures to be displayed:
Fit to Slide
1 Picture (up to 4 pictures per slide)
1 Picture with Title (up to 4 pictures per slide)

Created by Michelle for OLLI@WVU 11
8. Click the Create button.
9. WAIT PATIENTLY.
If you have a lot of pictures, high resolution pictures, or an
older computer, this process can take a while.
10. Check through individual slides and reformat any images
as needed.
11. Select the Transitions tab.
12. Use the keyboard command Ctrl + A to select all the
pictures in the presentation.
13. In the Timing section, under Advance Slide, place a
check beside After.
14. In the scroll box, set the number of seconds you want each
individual slide displayed.
15. Select the Slide Show tab.
16. Click the Set Up Slide Show button.
17. In the Show Options section, place a check
beside Loop continuously until ‘Esc’.
18. Click OK.

Created by Michelle for OLLI@WVU 12
Automatic Timings
If you are creating a slide show to run on its own, you need to set up automatic timings. This means
each slide will display for a set number of seconds and then automatically switch to the next slide.
Setting Up Automatic Timings
1. Switch to the Slide Sorter view. (See page 5)
2. Select all the slides in the presentation (Ctrl + A).
3. Select the Transitions tab of the ribbon.
4. In the Advance Slide section, place a check beside After.
5. In the scroll box beside after, set the time each slide should display. 00:15.00
will display a slide for fifteen seconds.
Loop Continuously
If you are creating a slide show to run on its own, you will probably want it to restart when it reaches
the last slide. This is done with Loop Continuously.
Toggling on Loop Continuously
1. Select the Slide Show tab of the ribbon.
2. Click the Set Up Slide Show button.
3. In the Show options section of the dialog box, place a check beside Loop continuously until
‘Esc’.
4. Click OK.
Slide Show View
Giving a Presentation
1. In the Document Views area, click on the Slide Show
button,
OR
Press the F5 key on the keyboard,
OR
In the View tab click the From Beginning or From Current Slide button

Created by Michelle for OLLI@WVU 13
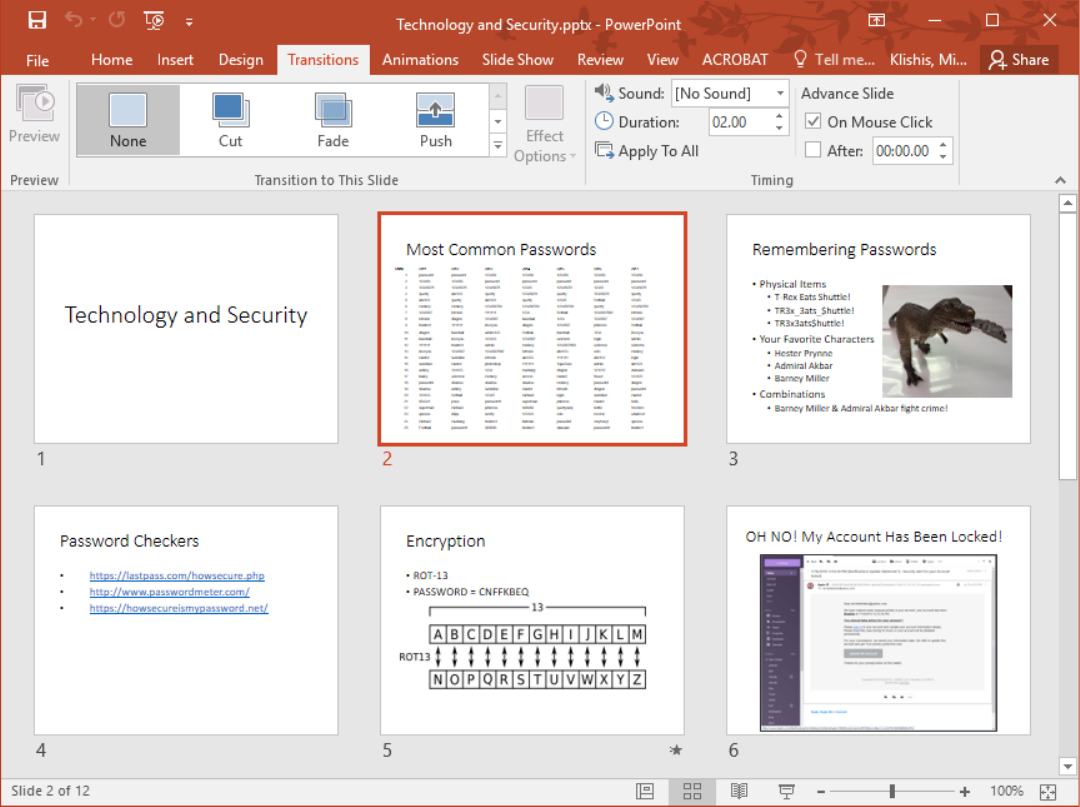
Presenter View
By default, when giving a presentation from a computer through a projector, PowerPoint 2016 uses
the Presenter View. This displays your slide on the projector and a presenter view, with notes and
upcoming slides, on the laptop or computer.
This view is useful if all you are doing is displaying your slides, but it can be frustrating if you plan to
switch between your presentation and other programs, such as a video or web page.
Created by Michelle for OLLI@WVU 14
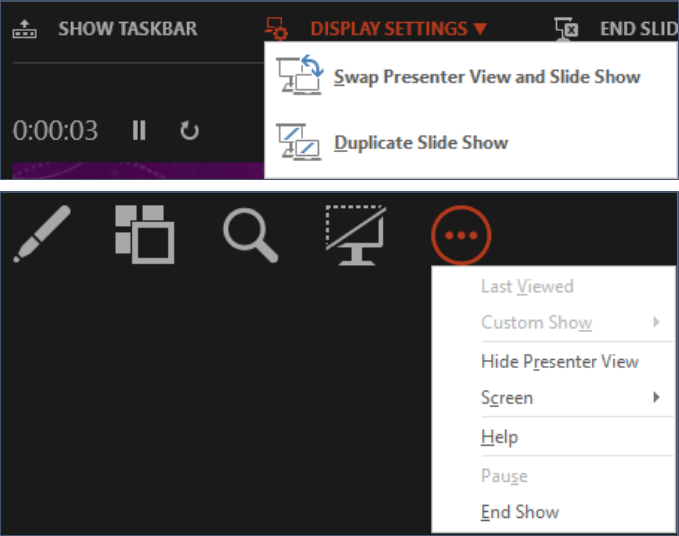
Switching Display Settings
1. At the top of the window, click
Display Settings.
2. From the drop down menu,
select Duplicate Slide Show
to exit the presenter view.
Hiding the Presenter View
1. To hide the presenter view
completely giving your
presentation, towards the
center of the screen, click the
circled ellipse button.
2. From the drop down menu,
select Hide Presenter View.
Moving through the Presentation
1. Press the Space Bar, Left click, press Enter, press the Down or Right arrow.
2. Press the Left or Up key, Right click in the presentation and choose Previous.
Ending the Slide Show
1. Press the Esc key.
OR
Right click and choose End Show.
OR
In the Presenter View, towards the top of the window, click End Slide Show.

Created by Michelle for OLLI@WVU 15
Guidelines for Good Presentations
• Font size should be between 28 and 32 point
• One idea per slide
• 4 to 5 bullet points per slide
• About five words per bullet
• Approximately one slide per minute
• DO NOT USE ALL CAPS
• PICTURES! Pictures over text! Text is boring!
• High contrast colors
• White space is important!

Created by Michelle for OLLI@WVU 16
PowerPoint Quick Reference
Command
Tab Location
Other
Keyboard
Reference
Action Button Insert > Illustrations
Align Image
Drawing Tools Format >
Arrange
Align Text Center Home > Paragraph
Mini
Toolbar
Ctrl + E
Align Text Left Home > Paragraph
Mini
Toolbar
Ctrl + L
Align Text Right Home > Paragraph
Mini
Toolbar
Ctrl + R
Animation Animations > Animations
Arrow Insert > Shapes > Block Arrows
Backstage View
File
Alt + F
Bold Home > Font
Mini
Toolbar
Ctrl + B
Borders
Table Tools Design > Table Styles
Bullets
Home > Paragraph
Change Case
Home > Font
Shift + F3
Clear Formatting Home > Font
Ctrl +
Spacebar
Close File > Exit button Ctrl + W
Compress
Pictures
Picture Tools Format > Adjust
Copy
Home > Clipboard
Right click
Ctrl + C
Crop Image Picture Tools Format > Size
Custom
Animation
Animations > Animations
Cut
Home > Clipboard
Right click
Ctrl + X
Design
Templates
Design > Themes
Document View
View > Presentation Views
Status Bar
Find
Home > Editing
Ctrl + F
Font Home > Font
Mini
Toolbar
Format Object
Drawing Tools Format tab
Right click
Format Painter Home > Clipboard
Mini
Toolbar
Ctrl+Shift+C
Ctrl+Shift+V

Created by Michelle for OLLI@WVU 17
Command
Tab Location
Other
Keyboard
Reference
Handouts
File > Print > Settings > Full
Page Slides button
Hide the Ribbon
Double click on an open tab
Ctrl + F1
Hyperlink Insert > Links Right click Ctrl + K
Images Insert > Images
Import Chart
Insert > Insert Object
Import Slides
Home > New Slide Button Arrow
> Reuse Slides
Indent Home > Paragraph
Mini
Toolbar
Insert Slide Home > Slides Right click Ctrl + M
Italic Home > Font
Mini
Toolbar
Ctrl + I
Layout
Home > Slides
Right click
Line Spacing Home > Paragraph
Movies Insert > Media
New
Presentation
File > New tab Ctrl + N
New Slide Home > Slides Right click Ctrl + M
Non-Keyboard
Characters
Insert > Symbols
Normal View View > Presentation Views
Presentation
Views
Notes Views > Presentation Views
Numbering Home > Paragraph
Open
File > Open
Ctrl + Open
Open Recent File File > Recent tab
Quick
Access
Toolbar
Paste Home > Clipboard Right click Ctrl + V
Paste Special
Home > Paste down arrow >
Paste Special
Right click
Photo Album Insert > Images
Picture Insert > Images

Created by Michelle for OLLI@WVU 18
Command
Tab Location
Other
Keyboard
Reference
Picture Border
Picture Tools Format > Picture
Styles
OR
Home tab > Drawing
Presentation
Format
Design > Page Setup
Print File > Print
Quick
Access
Toolbar
Ctrl + P
Print Handouts
File > Print > Settings >
Handouts
Program Options
File > Options button
Reading View View > Presentation Views Status Bar
Recent Files File > Recent tab
Quick
Access
Toolbar
Redo
Quick
Access
Toolbar
Ctrl + Y
Replace
Home > Editing
Ctrl + H
Reuse Slides
Home > New Slide down arrow >
Reuse slides
Save File > Save or Save As
Quick
Access
Toolbar
Ctrl + S
Save As
File > Save As button
F12
Save As Slide
Show
File > Save As button
Screenshots Insert > Images
Select All
Home > Editing > Select button
> Select All
Ctrl + A
Set Up Show Slide Show > Set Up
Shapes
Insert > Illustrations
OR
Home tab > Drawing
Slide Layout
Home > Slides
Right click
Slide Master View > Master Views
Slide Show from
Beginning
Slide Show > Start Slide Show F5
Slide Show from
Current Slide
Slide Show > Start Slide Show
Presentation
Views
Shift + F5

Created by Michelle for OLLI@WVU 19
Command
Tab Location
Other
Keyboard
Reference
Slide Sorter View View > Presentation Views
Presentation
Views
Slide Template Design > Themes
Slide Transition
Transitions > Transition to This
Slide
Speakers Notes Views > Presentation Views
Spell Check Review > Proofing Right click F7
Start Slide Show
from Beginning
Slide Show > Start Slide Show
Presentation
Views
F5
Start Slide Show
from Current
Slide
Slide Show > Start Slide Show
Presentation
Views
Shift + F5
Switch Windows View > Window
Windows
taskbar
Alt + Tab
Symbol Insert > Symbols
Table Insert > Tables
Table: Add Row /
Column
Table Tools Layout >Rows &
Column
Table: Delete
Table Tools Layout > Rows &
Columns
Templates Design > Themes
Text Box Insert > Text
Text Size Home > Font Mini toolbar
Themes Design > Themes
Transitions Transitions
Underline Home > Font
Mini
Toolbar
Ctrl + U
Undo
Quick
Access
Toolbar
Ctrl + Z
Video Insert > Media
View
View > Presentation Views
Status Bar

Created by Michelle for OLLI@WVU 20
Command
Tab Location
Other
Keyboard
Reference
Word Art Insert > Text
Zoom View > Zoom Status Bar

